If you’ve ever created a TikTok video, you’ll notice something.
The videos tend to be blurry (or glitchy sometimes) after upload. Now, that’s a problem.
Ideally, you’d want high-quality videos for your audience.
They give your audience clear and crisp content, so they don’t have to squint. Plus, there’s a certain level of professionalism to HD videos.
Here’s what I mean.
You have two videos. Both videos have varying quality, the first being 144p and the second 1080p. You have to squint to see what’s happening in the first video but not in the second one.
From the scenario above, you’re more likely to continue watching the second video than the first. This also means you’ll turn to the second creator for more content for your pain point. Get it now?
So, how can you make your TikTok videos clearer?
Thankfully, there are ways to make your TikTok videos clearer. You can do this by setting your specifications and screen resolution right, turning off Tiktok’s data-saving feature, or activating the HD setting for video uploads.
In this article, we’ll go through all these techniques to make clearer TikTok videos, so your next video can pack a punch. But before we get into that, let’s see why your TikTok videos are blurry.
Why Are My TikTok Videos Blurry?
Your videos can be blurry for several reasons.
It can be your phone’s camera, the gadget you’re using, or your resolution settings for video editing. You can also upload a high-resolution video on TikTok, and it’ll still come out blurry.
How?
Surprisingly, the TikTok app can lower your video’s quality. Make no mistake: TikTok means well. Videos with lower quality translate to faster loading times, better upload speeds, and data conservation for their users.
However, lowering video quality can affect the experience of your audience. If that’s not for you, here’s how to create clearer videos on TikTok.
Method #1: Choose the Right Video Specifications
One reason TikTok reduces the quality of some videos is that they don’t meet the specifications for uploading videos on the platform.
For your videos to make the cut, you need to:
- Choose the right size for uploading videos. Your videos have to be no more than
500MB. - Upload your video in the recommended format. The allowed formats are
.mp4,.mov,.mpeg,.3gp, and.avi. - Set your video to the proper resolution. This means resolutions in the range of
540x960px,640x640px, or960x540px.
You can go the extra mile by ensuring your video’s bitrate is no lower than 516 kbps.
You’ll have no resolution if you use TikTok’s camera for your recording, as it’s built according to their specifications. If you’re not making too many edits to your videos, you can record them in the app.
Method #2: Check Your Screen Resolution
With many high-tech recording gears out there, you have many resolution options to choose from.
There’s the 360p, 720p, 1080p, 4k, and even the 8k. These resolutions keep your videos high definition.
However, there’s a limit to the resolution you can post on TikTok; 1080p. If you upload a 4k or 8k video on the app, it’s automatically reduced to 1080p.
Resizing your videos before uploading them on TikTok helps you maintain a high 1080p resolution. The automatic resize in the app tends to output a lower 1080p.
Method #3: Turn off Data Saving
TikTok’s data-saving feature ensures faster loading times and conserves your data plan. However, this feature can also lower your video quality.
One way to maintain your video’s clarity is to turn off the data-saving feature; here’s how:
- Go to the “Profile” tab on TikTok.
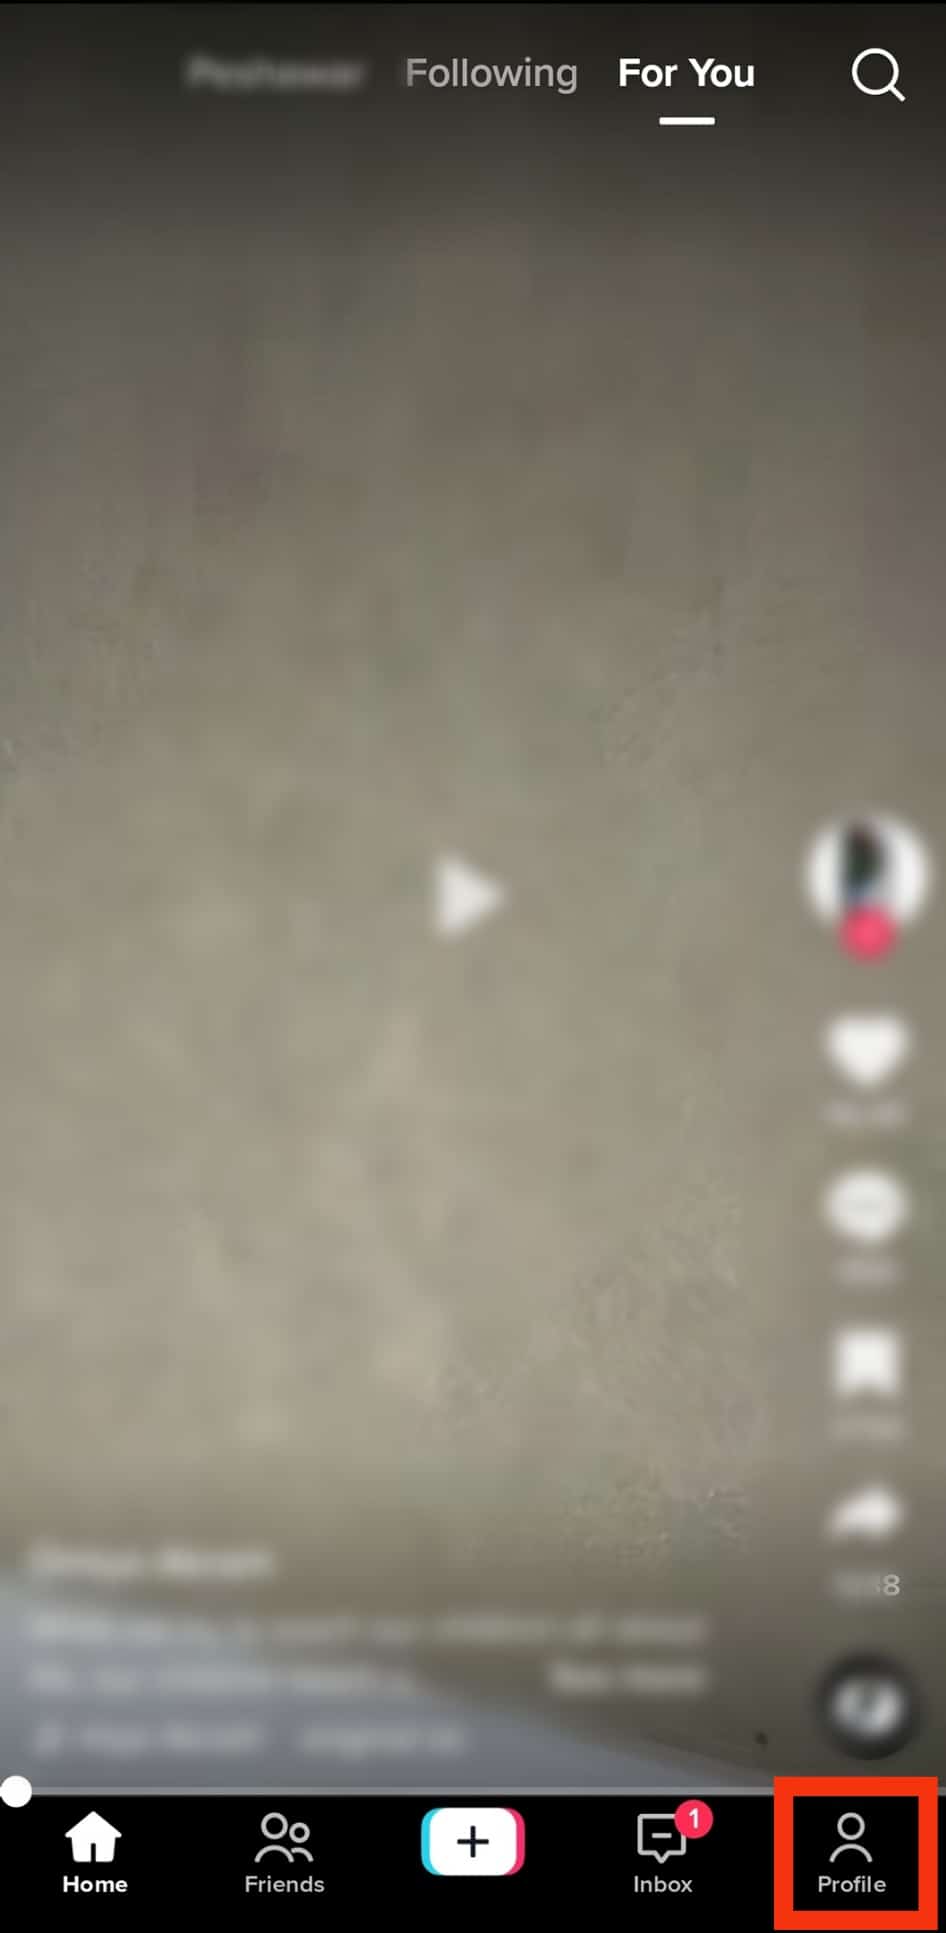
- Tap on the menu icon in the top right corner.

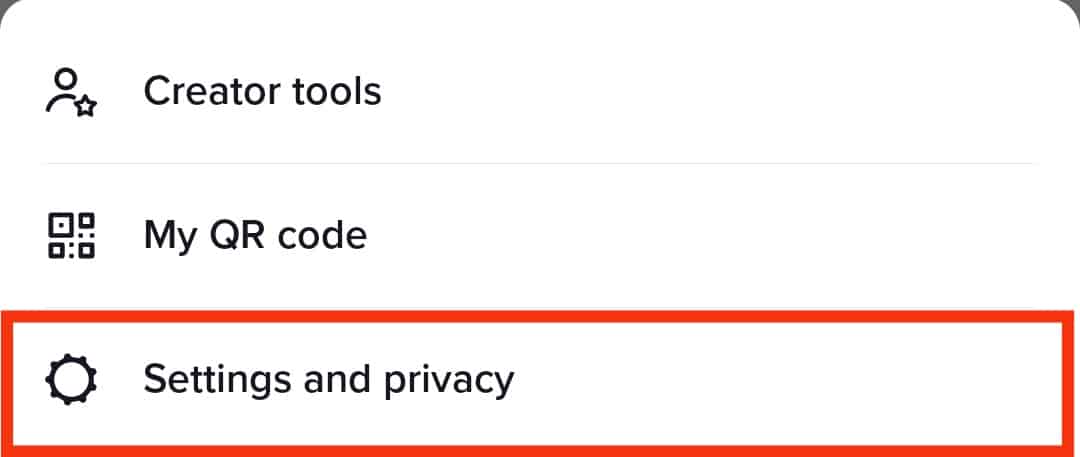
- Select “Settings and privacy.”
- Choose “Data Saver” under “Cache and Cellular.”
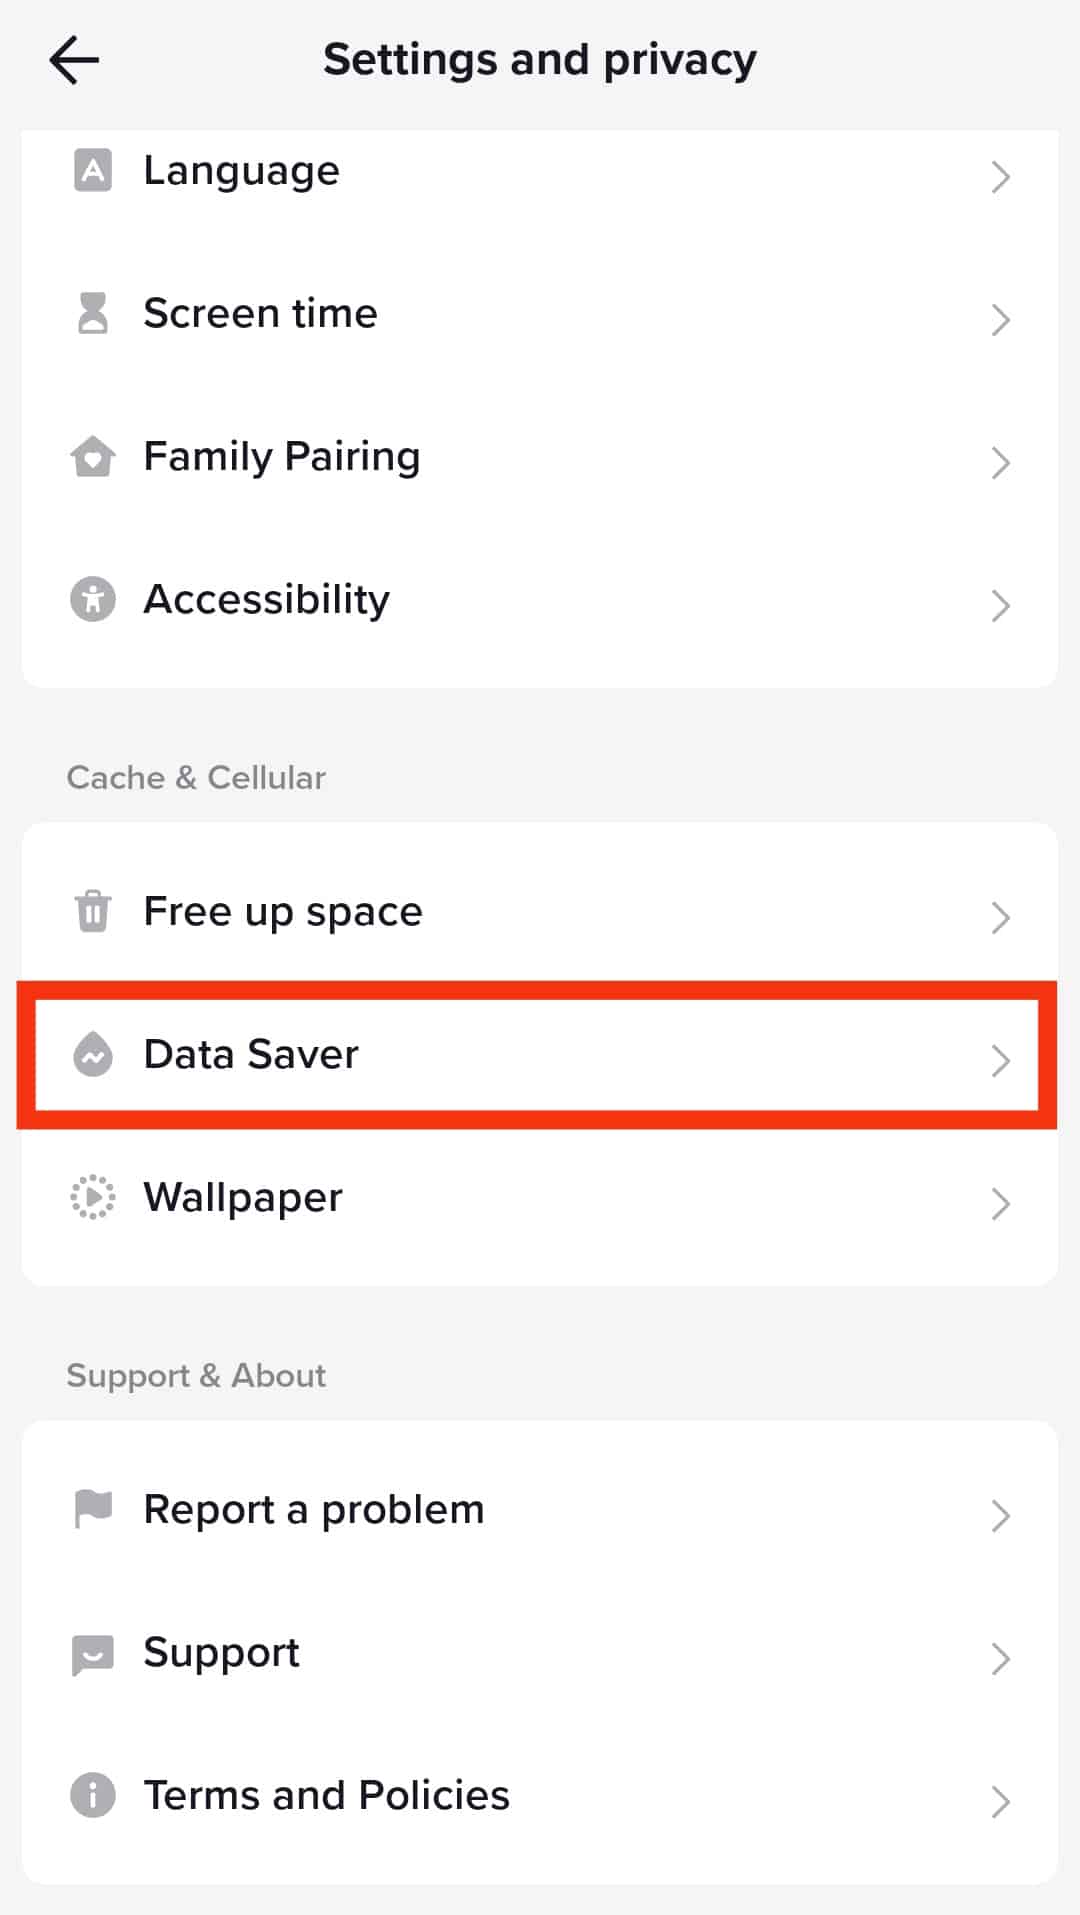
- Disable the “Data Saver” by toggling the option off.
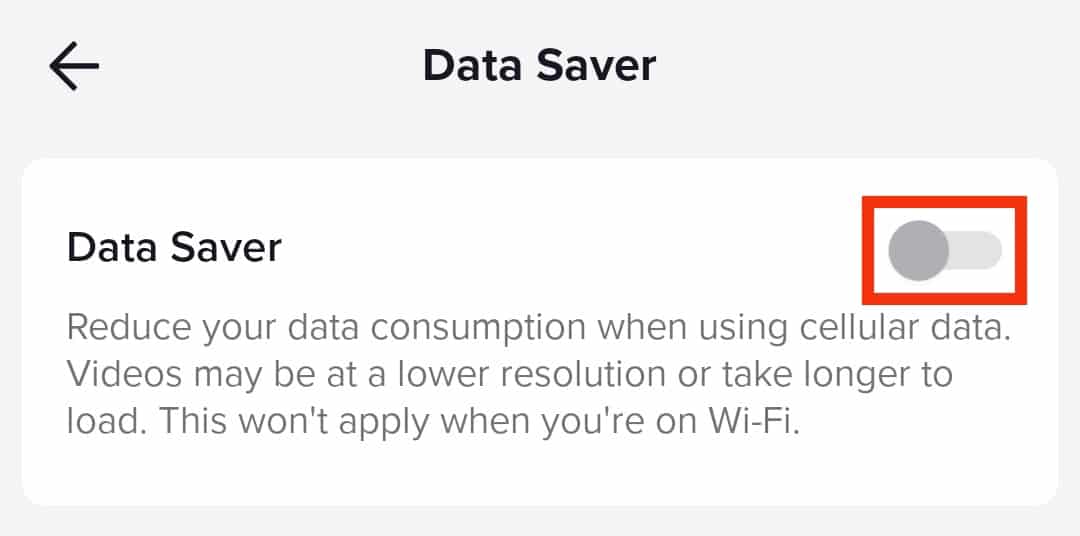
Once you’re done, restart the app to kick in your new settings.
How To Upload HD Video on TikTok
You may not know this already, but TikTok has a functionality that allows you to upload HD videos to your profile. For some reason, it’s not switched on automatically, and the setting seems hidden.
Anyway, if you want to upload high-definition videos directly, you can do it by following the steps below.
Step #1: Prepare Your Video
Record or upload your video in the app as you normally do.
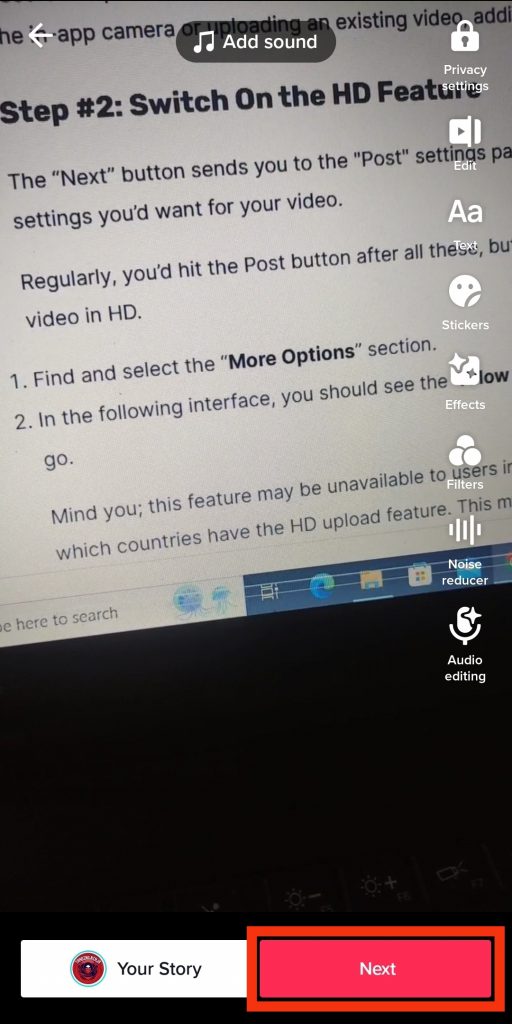
This means tapping the “+” sign at the bottom, using the in-app camera or uploading an existing video, adding your filters and whatnot, and finally, pressing “Next.”
Step #2: Switch On the HD Feature
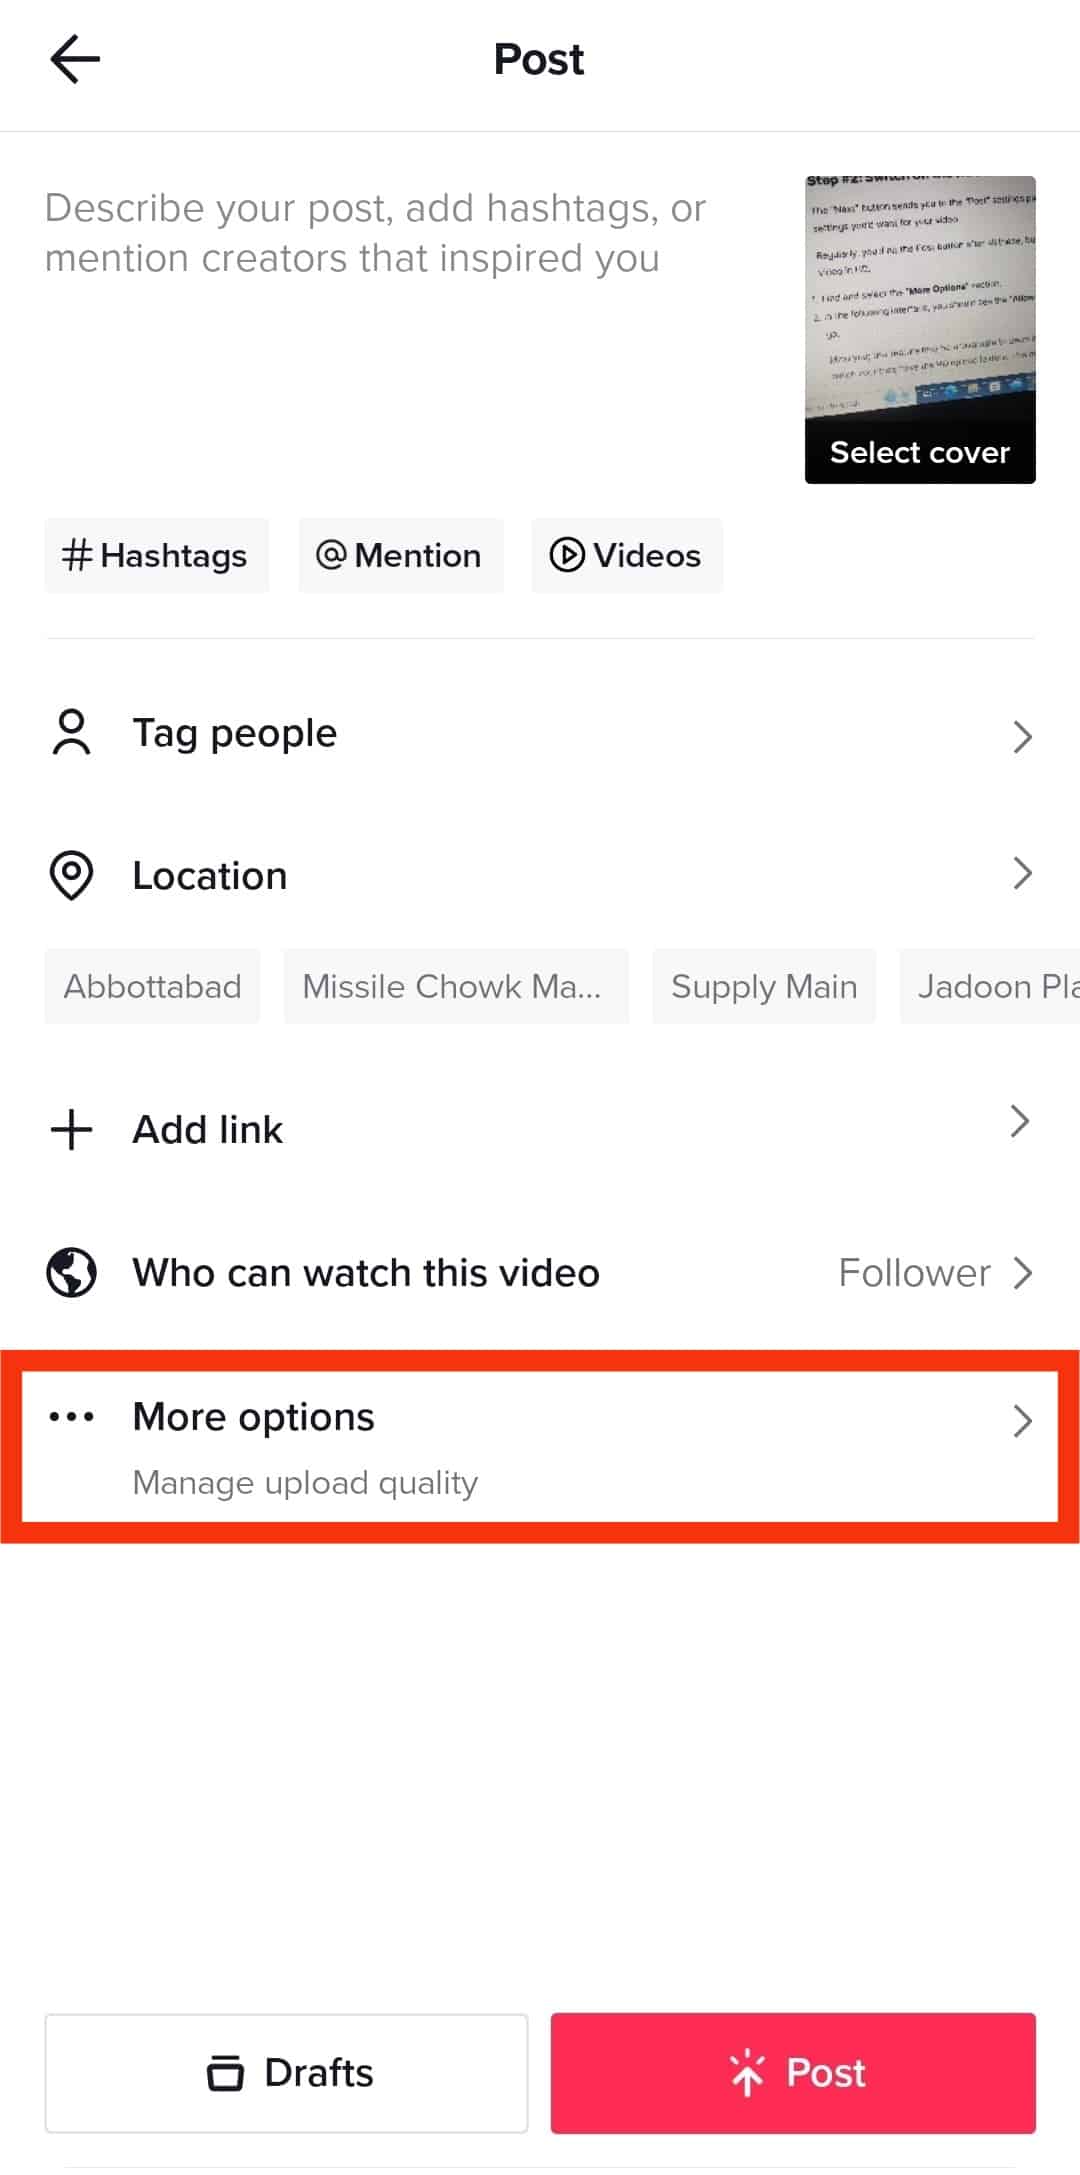
The “Next” button sends you to the “Post” settings page. Here, you can add captions and tags and set any privacy settings you want for your video.
Regularly, you’d hit the Post button after all these, but now you’ll have to toggle the HD switch to upload your video in HD.
Follow these steps:
- Find and tap the “More options” button.
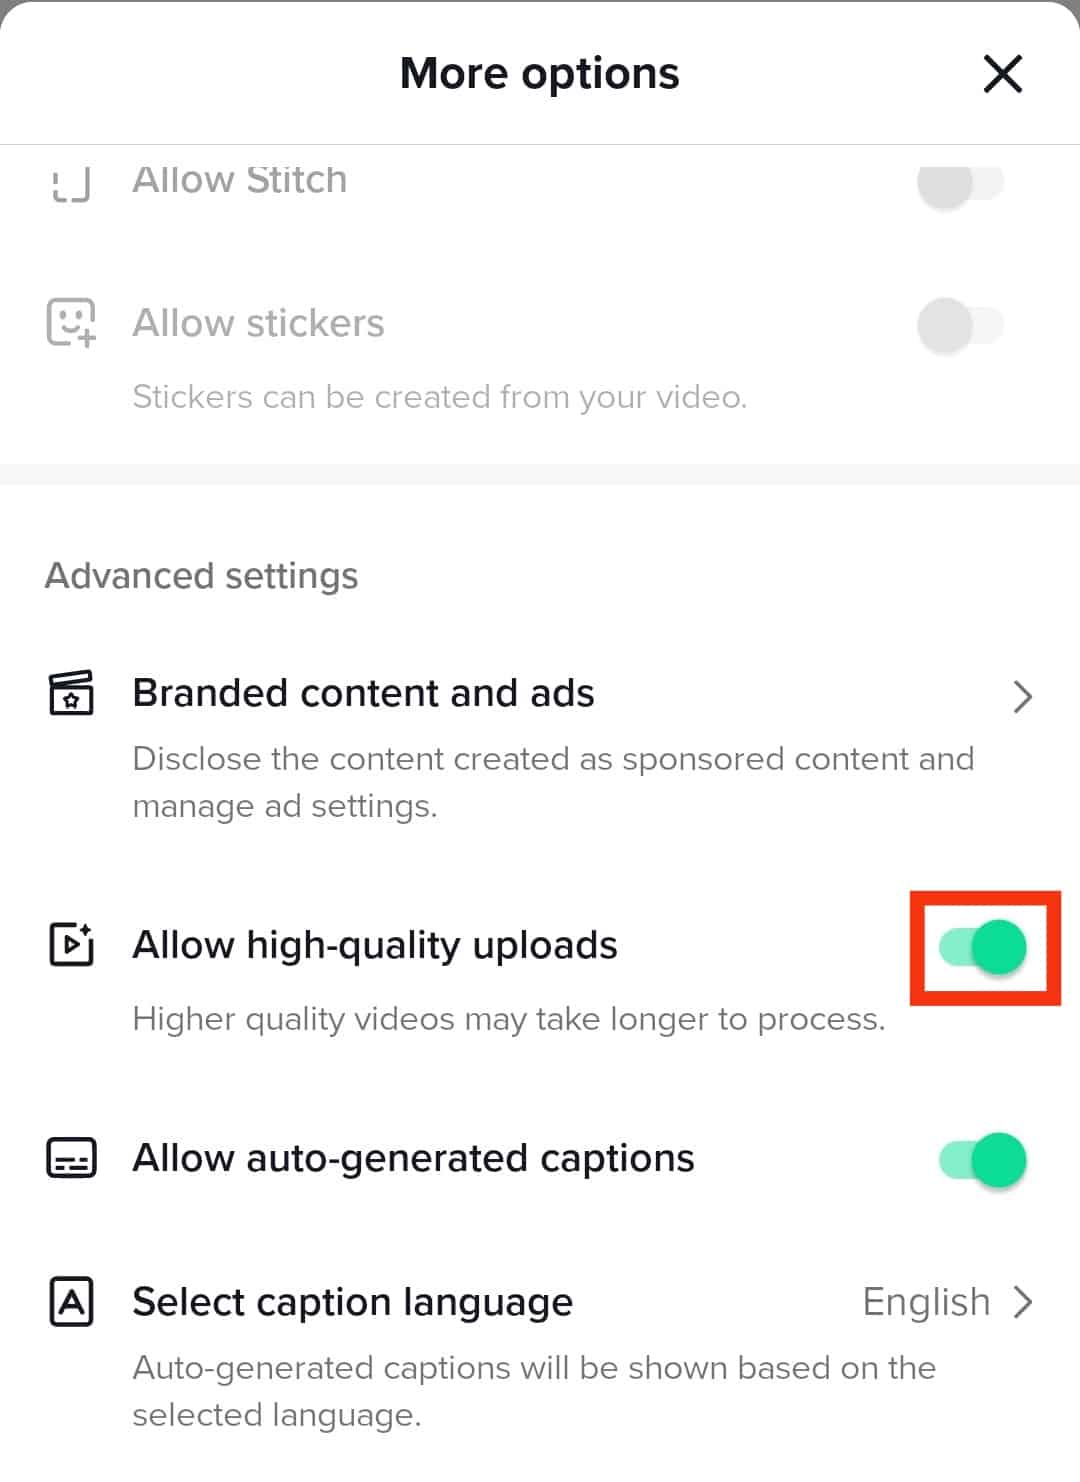
- You should see the “Allow high-quality uploads” option. Toggle that on, and you’re good to go.
Mind you, this feature may be unavailable to users in some countries. Sadly, there’s no official list from TikTok as to which countries have the HD upload feature. This means you’ll have to find out the old-fashioned way: trial and error.
Your videos may now take longer to upload since higher quality means bigger file sizes. After your wait, it’s a good idea to view your uploaded video in your feed to see what it looks like.
Conclusion
There are many reasons your TikTok videos aren’t clear.
It could be your camera, your phone, or, the more likely reason, TikTok’s automatic resizing.
Luckily, there’s a workaround.
By using the proper video specifications, keeping to TikTok’s recommended resolution, and disabling the data-saving feature, you can make clearer videos for your audience.
But there’s more.
You can also turn on the HD upload feature in the post settings to upload high-definition videos from the get-go.


