WhatsApp allows you to change your phone number at your convenience. Only one phone number can be linked to a WhatsApp account. Suppose you want to use a different number. You can quickly change the phone number.
When you do, you can choose to notify your contacts about the change in the phone number or hide it from them. We will detail the process of changing your phone number without informing your contacts.
Whether you are using Android or iOS, you can change your phone number from the “Settings” page of your WhatsApp account:
1. Open your WhatsApp and navigate to the “Settings” page.
2. Select “Account” and tap the “Change number” option.
3. Tap “Next” and enter your old phone number and the one you wish to replace it with.
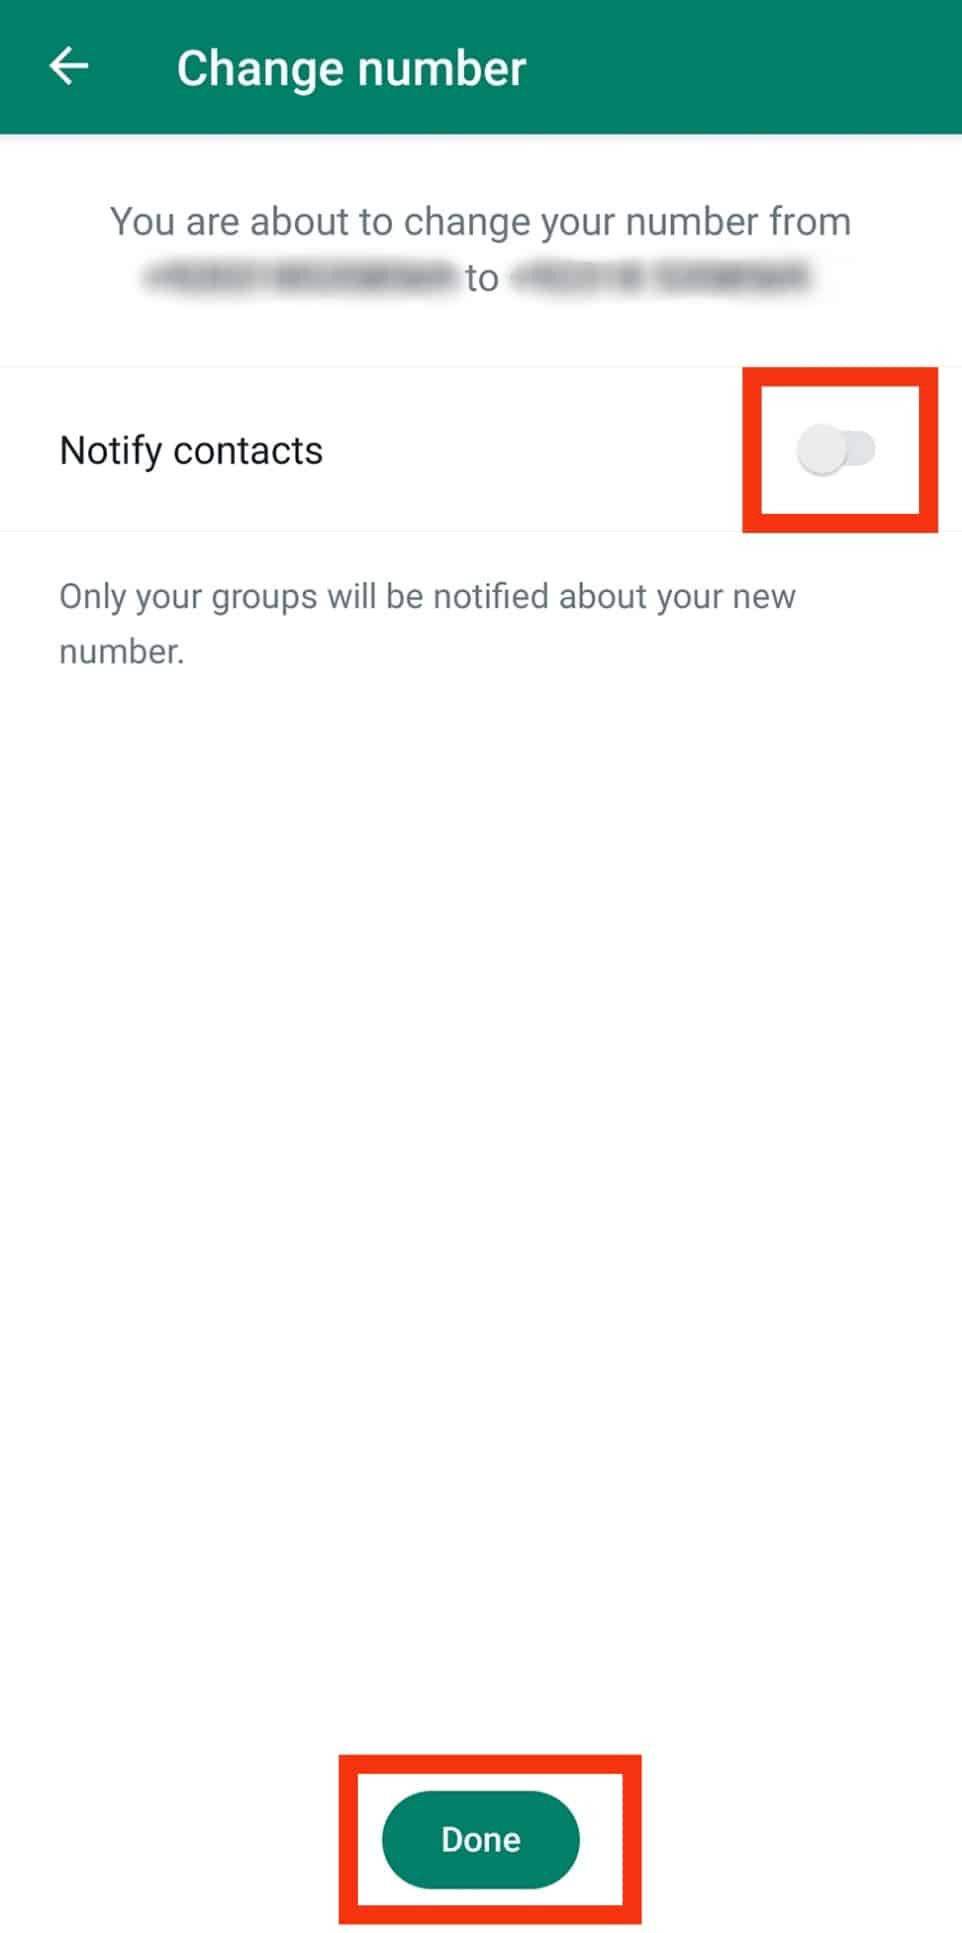
4. Hit “Next” again. Turn off the “Notify contacts” option and tap “Done.”
5. Enter the verification code sent to your phone to authenticate the process.
We will understand why you may want to change your phone number on WhatsApp without notifying your contacts. Still, we will cover the steps to follow when you want to change your phone number on Android and iOS. Let’s begin!
Why Change Your WhatsApp Number Secretly?
Are you looking to change your WhatsApp number?
WhatsApp is a popular messaging platform used by many people globally. With WhatsApp, you can chat with anyone if you have their WhatsApp number.
When registering for WhatsApp, you must register with your phone number. Besides, you can change the number associated with your phone number anytime.
Suppose you don’t want people to be notified about the phone number change. There is an option to do it secretly.
This way, you can dodge these unnecessary conversations that could arise after someone gets notified about the change in the phone number.
Still, it could be you enjoy doing things in private and don’t want everyone in your contacts to know about the change in the phone number.
Whatever your reason is, you can change your WhatsApp number secretly, provided you know how to achieve that.
How To Change WhatsApp Number
Changing the phone number can be done from the settings page of your WhatsApp. We will cover the steps to follow for Android and iOS.
For Android
Follow these steps:
- Open WhatsApp on your Android device.

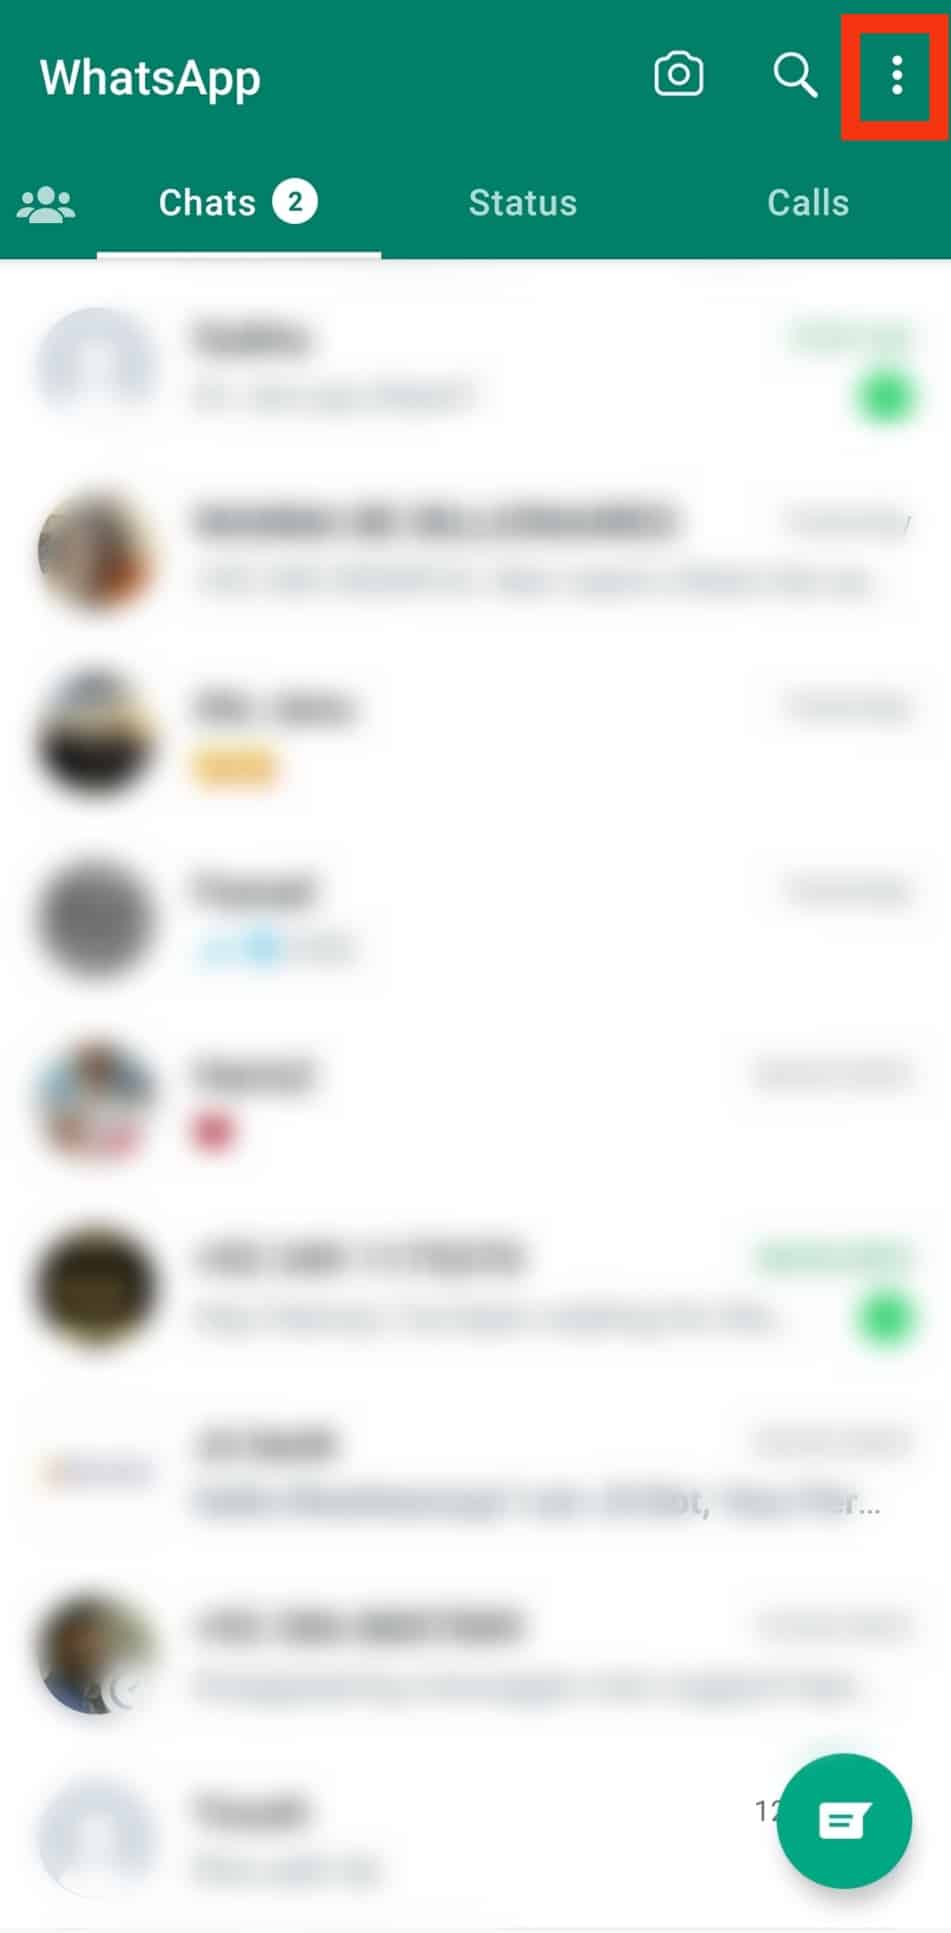
- Tap the three dots at the top.
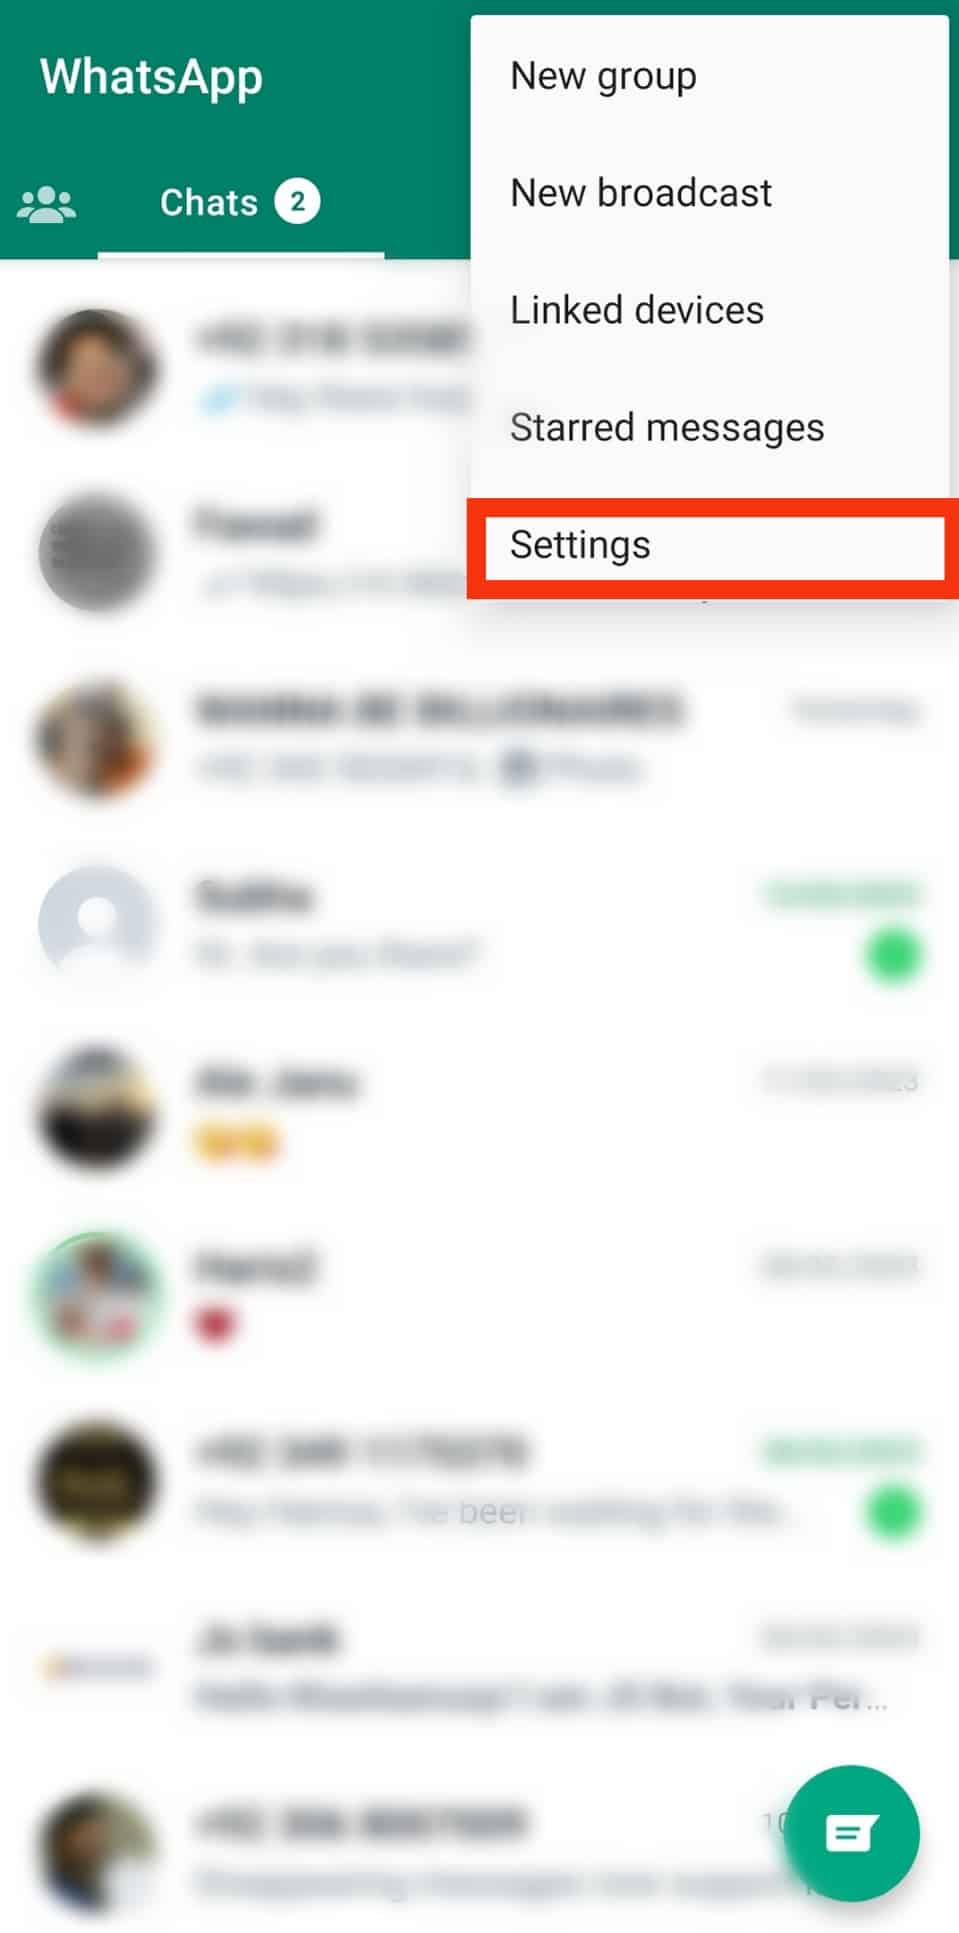
- Select the “Settings“ option.
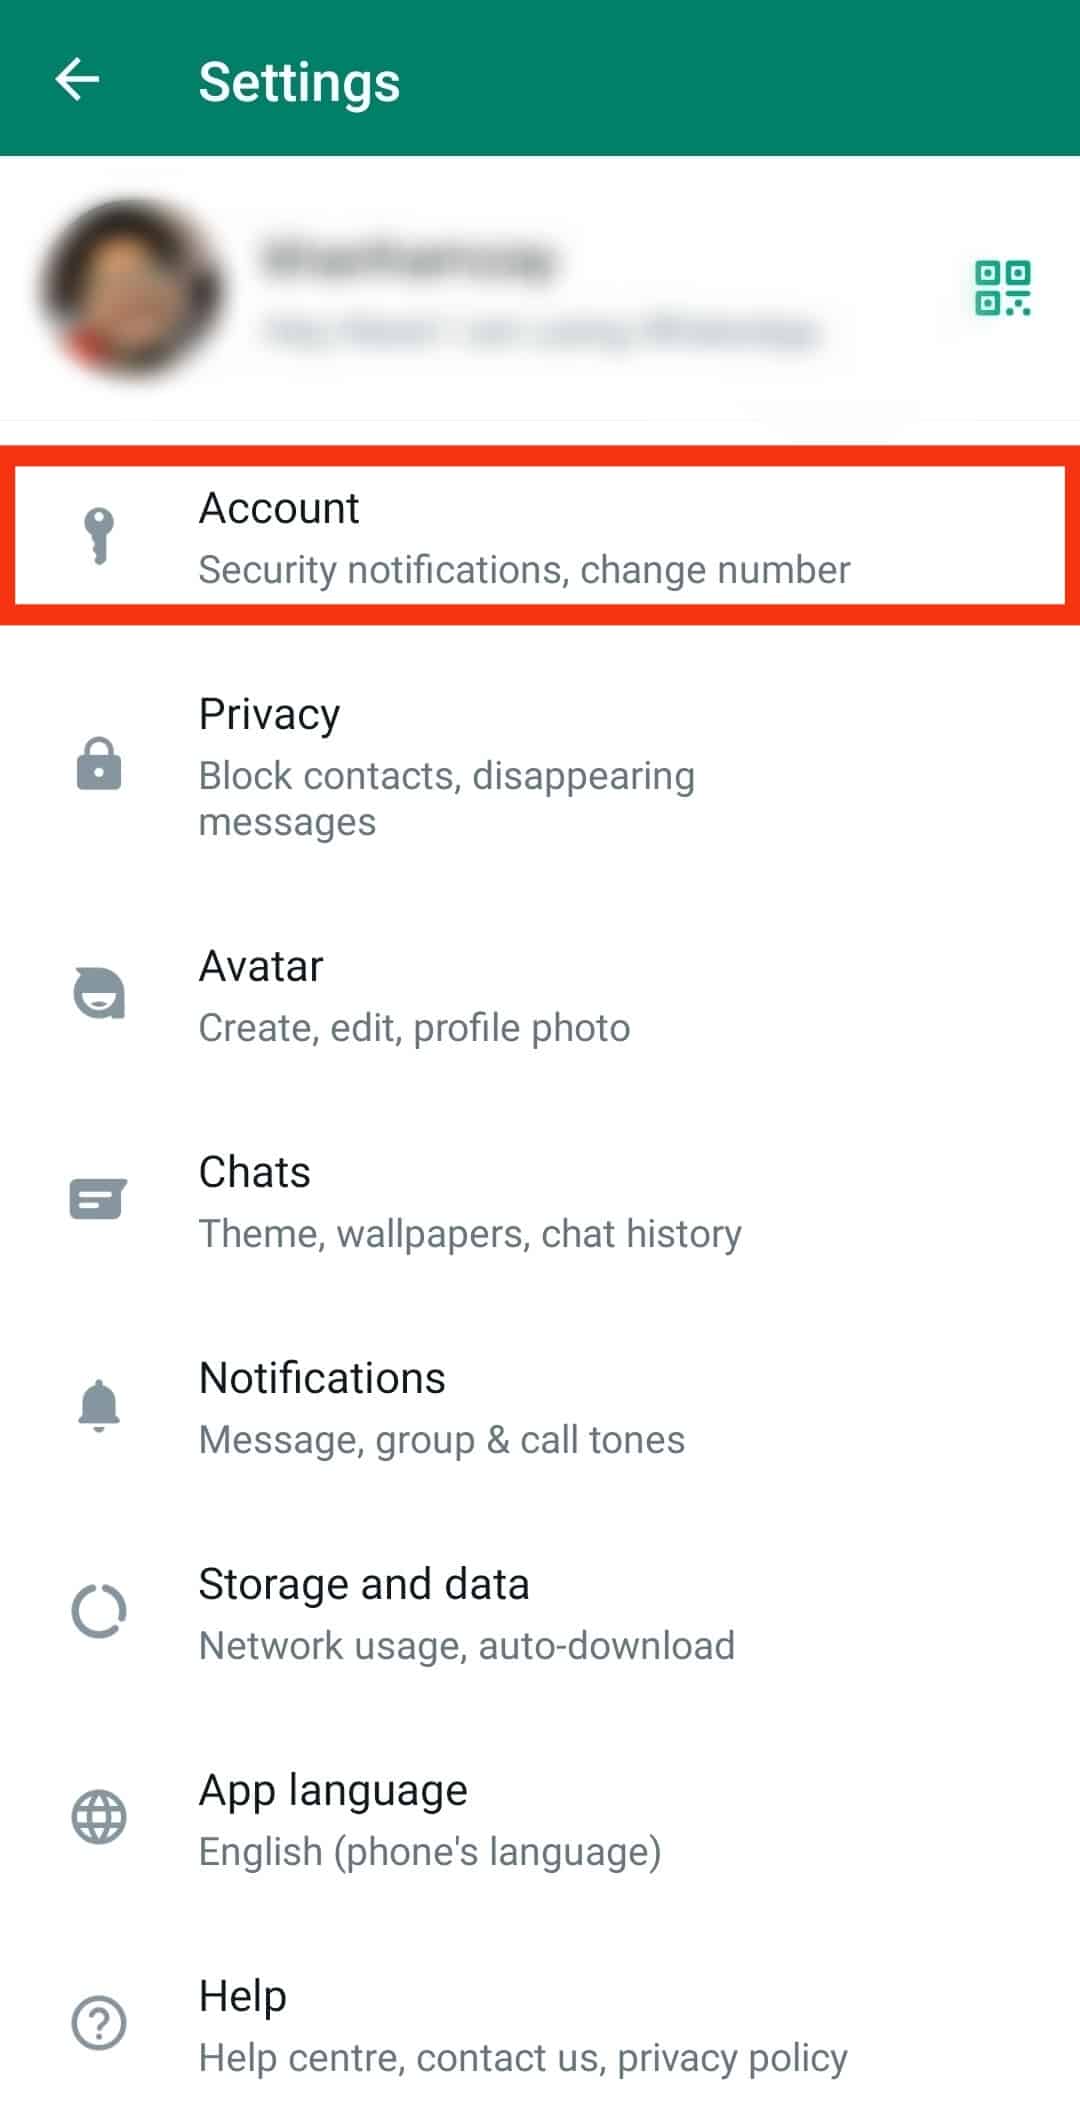
- Tap the option for “Account.”
- Tap the “Change number“ option.
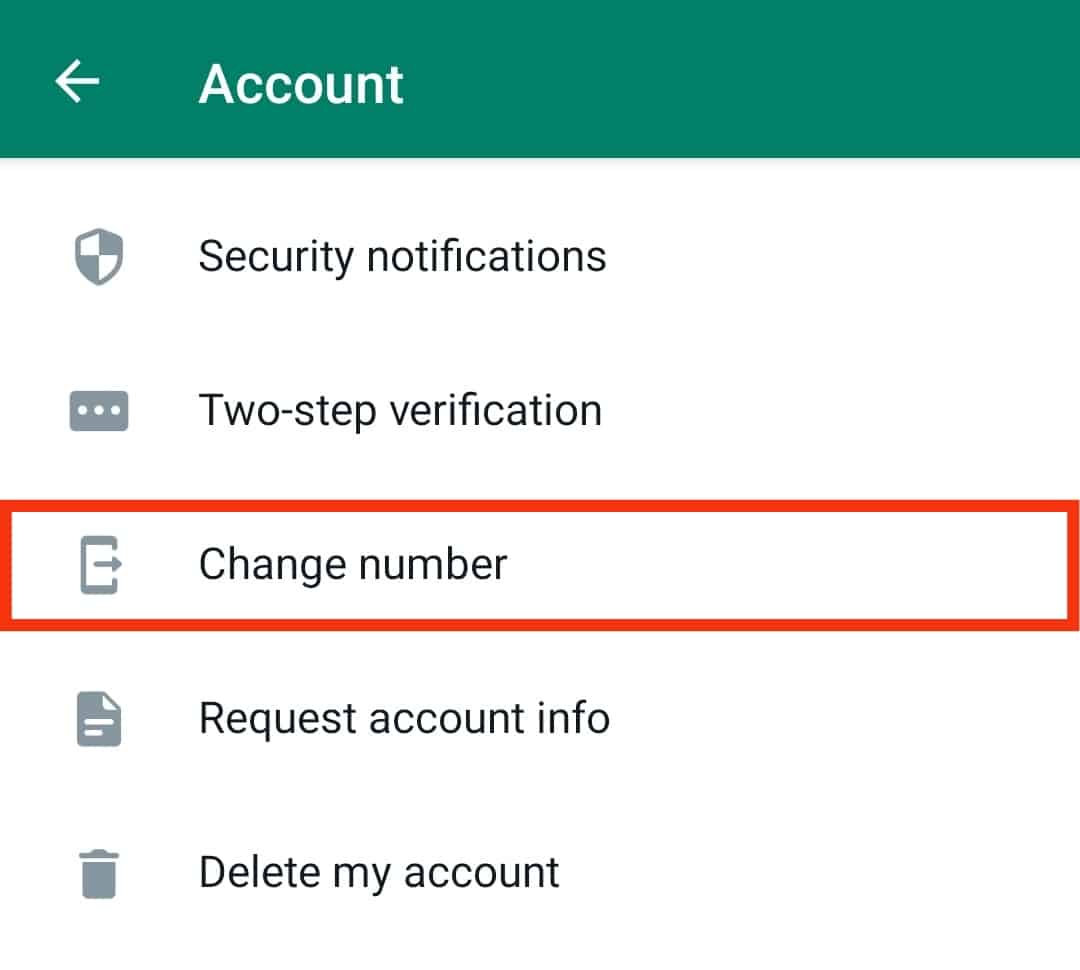
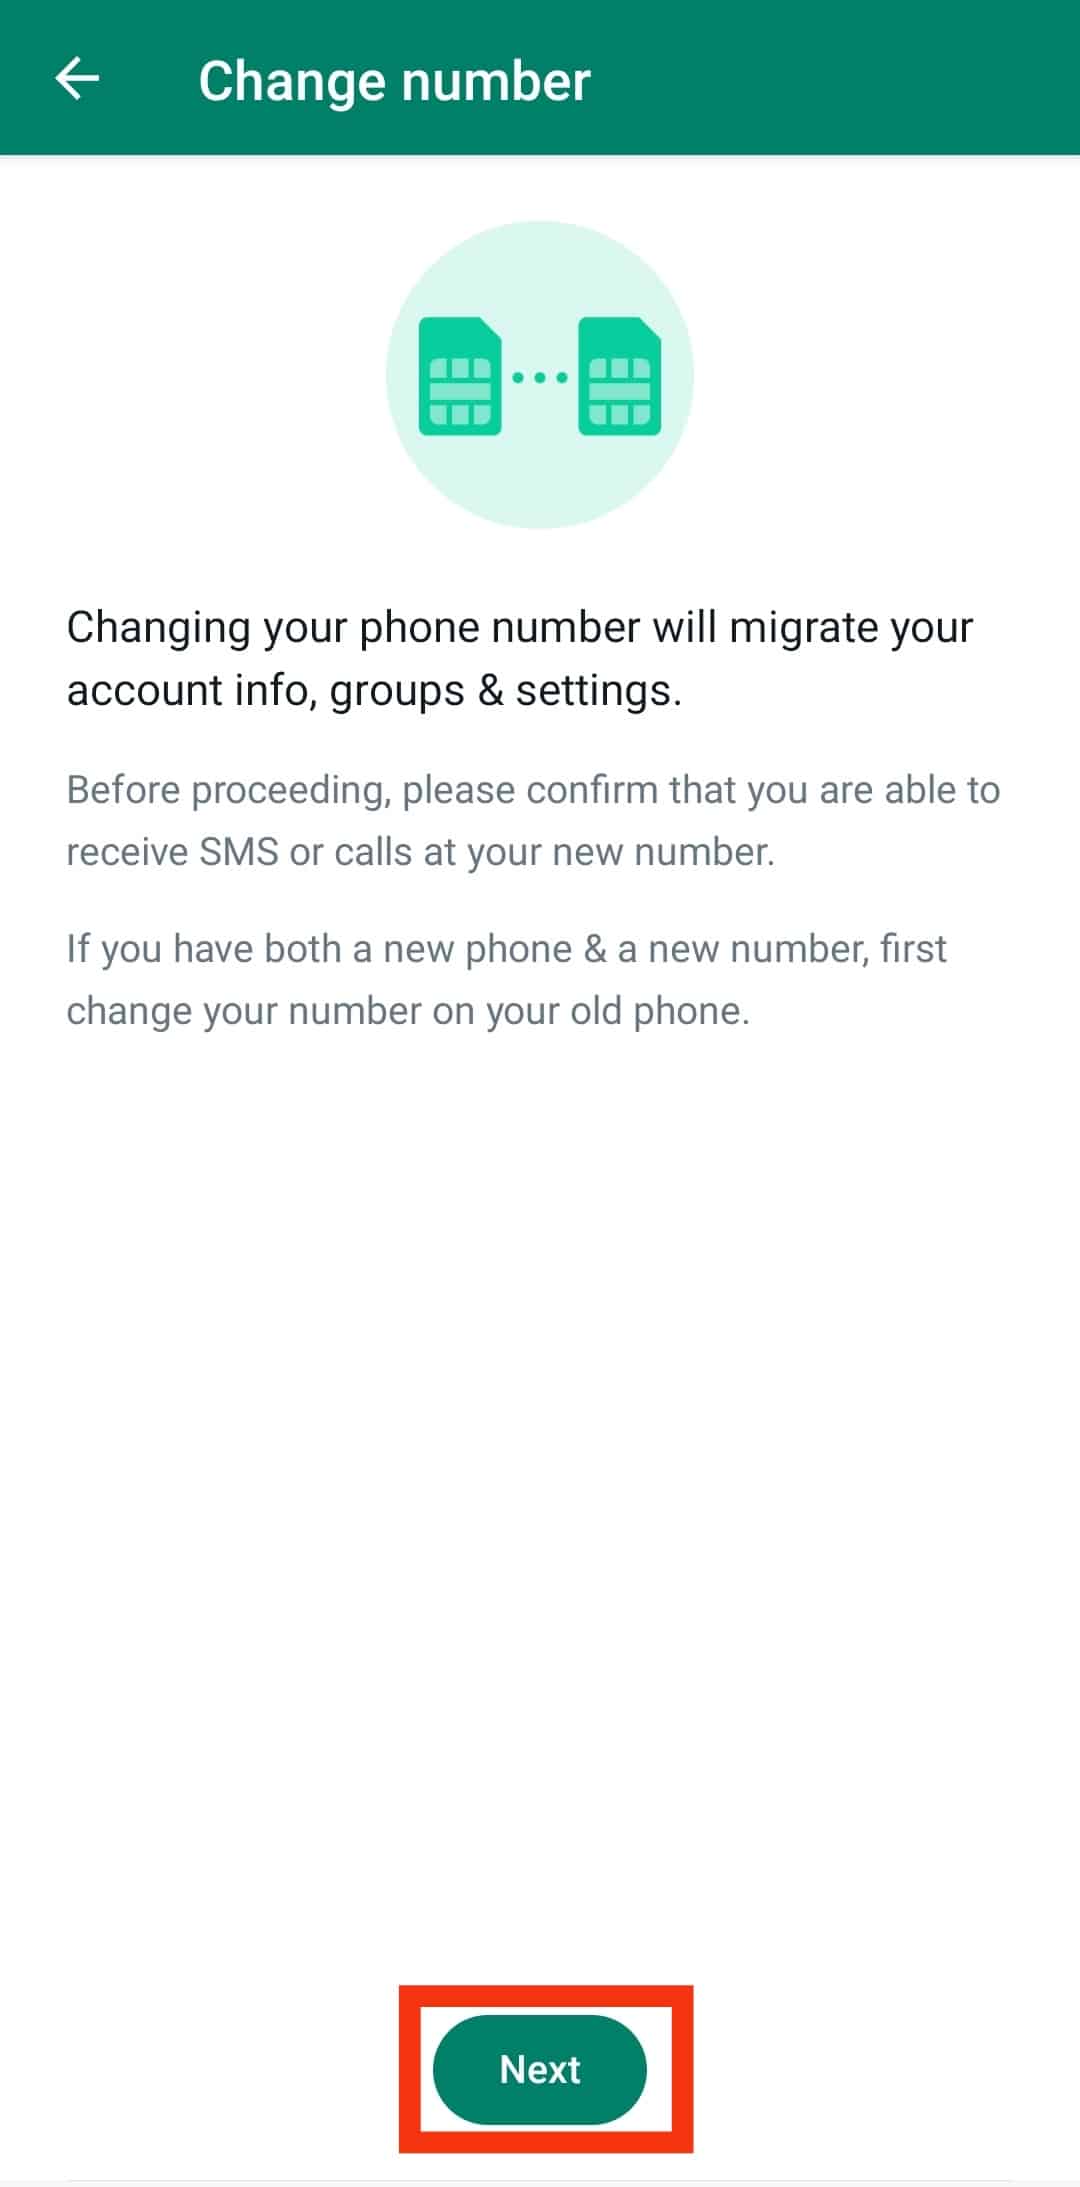
- Tap “Next” at the bottom.
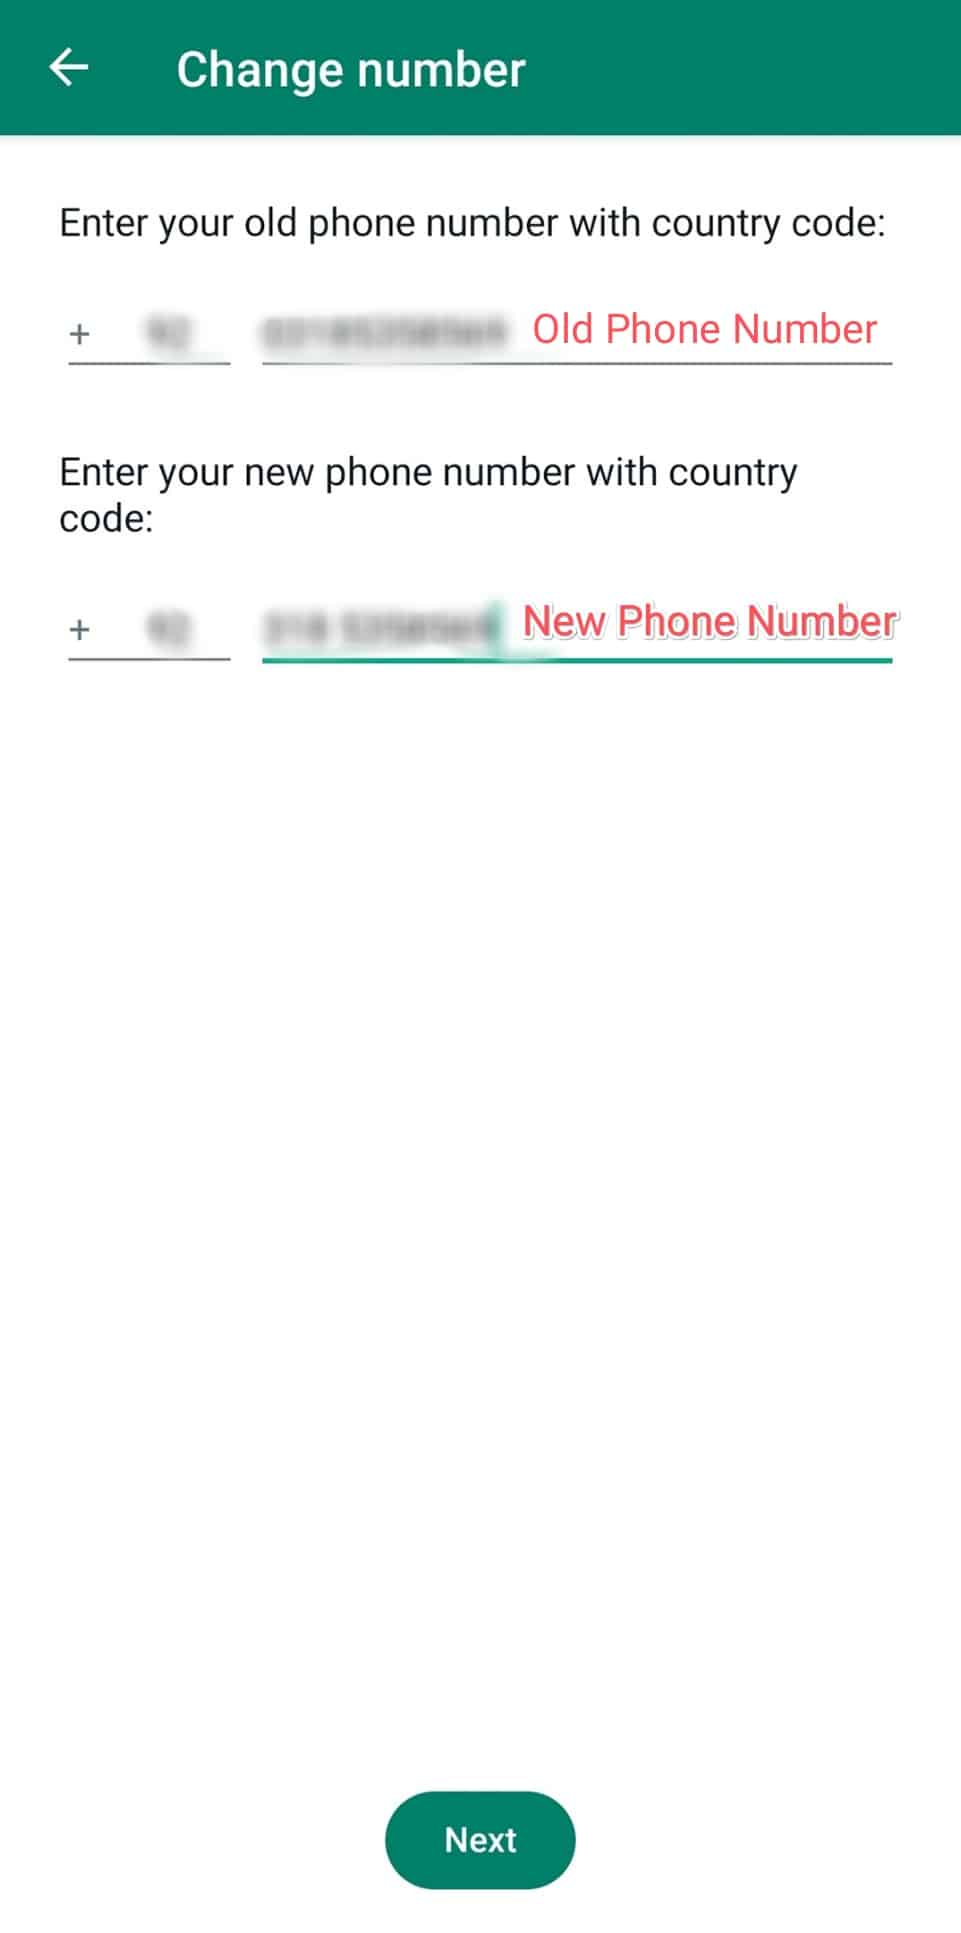
- Enter your old phone number in its respective field and the new phone number using the correct format, including the country code.
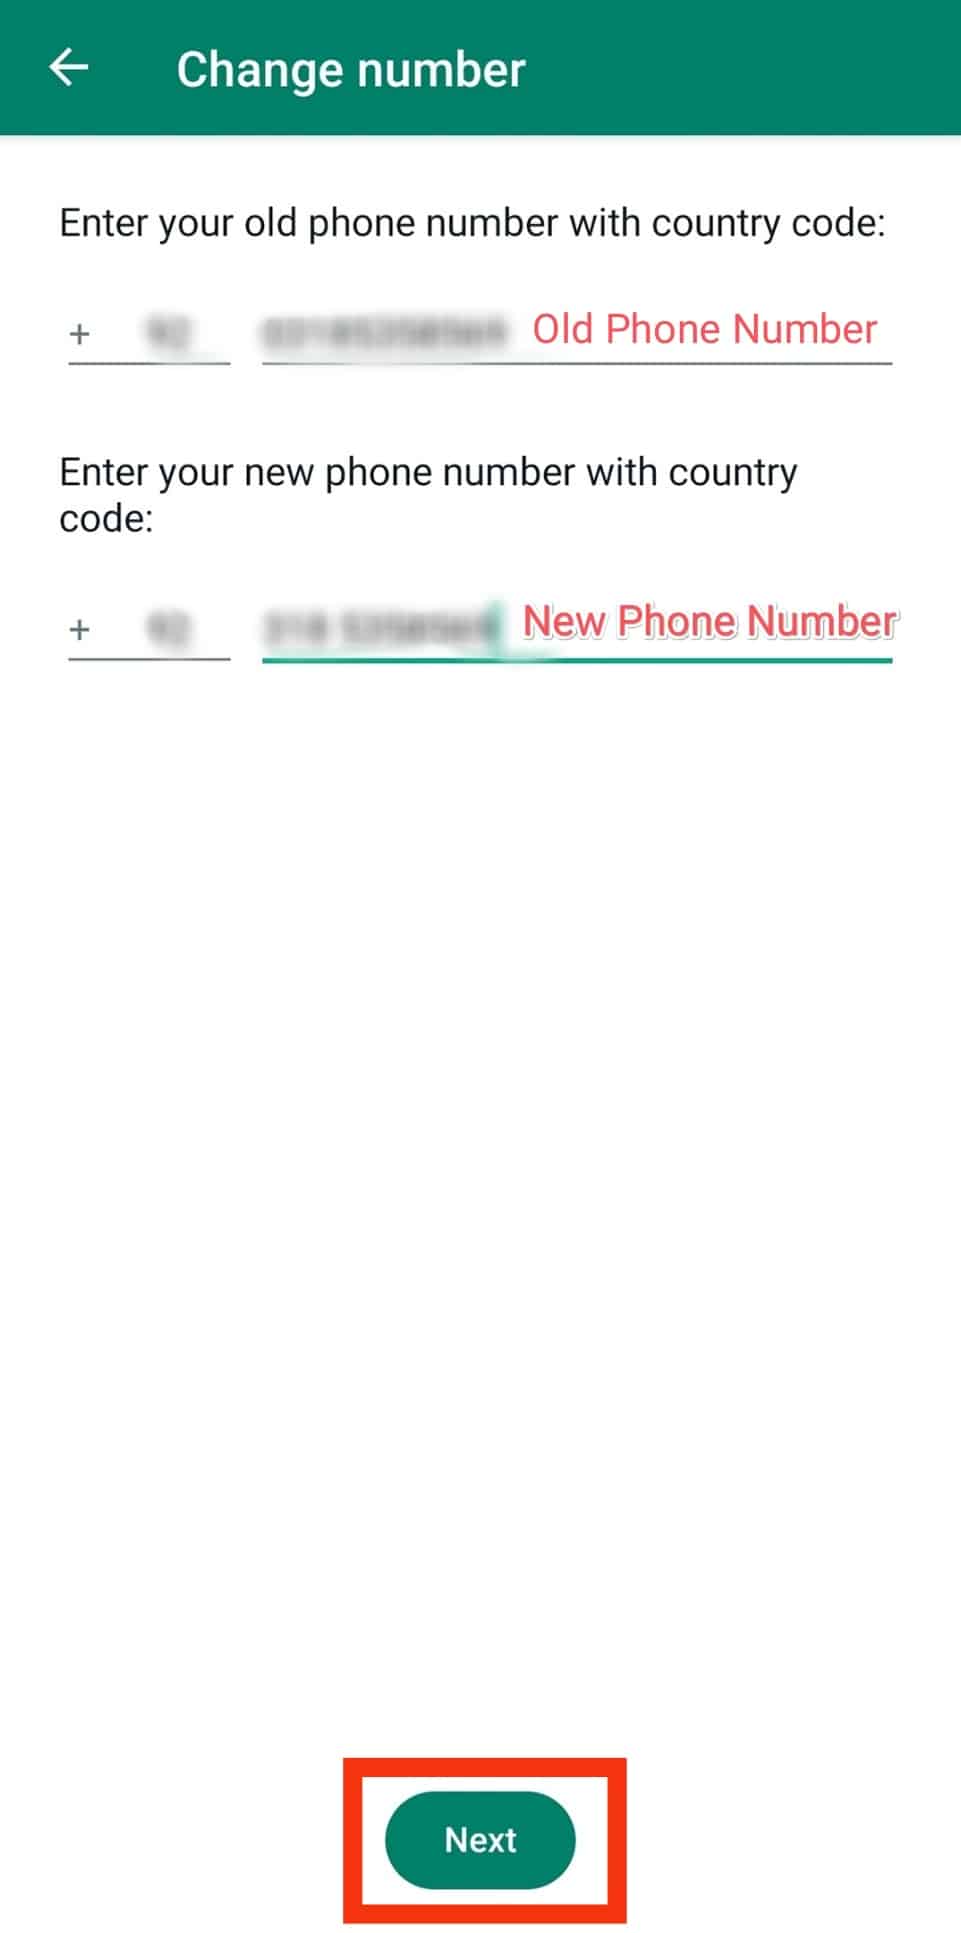
- Tap “Next“ at the bottom.
- Ensure the “Notify contacts” option is disabled and hit “Done.”
- Enter the verification code sent to your phone.
That’s it. Your phone number is now changed.
For iOS
Follow these steps:
- Open WhatsApp on your iOS device.

- Tap on “Settings” in the bottom right corner.

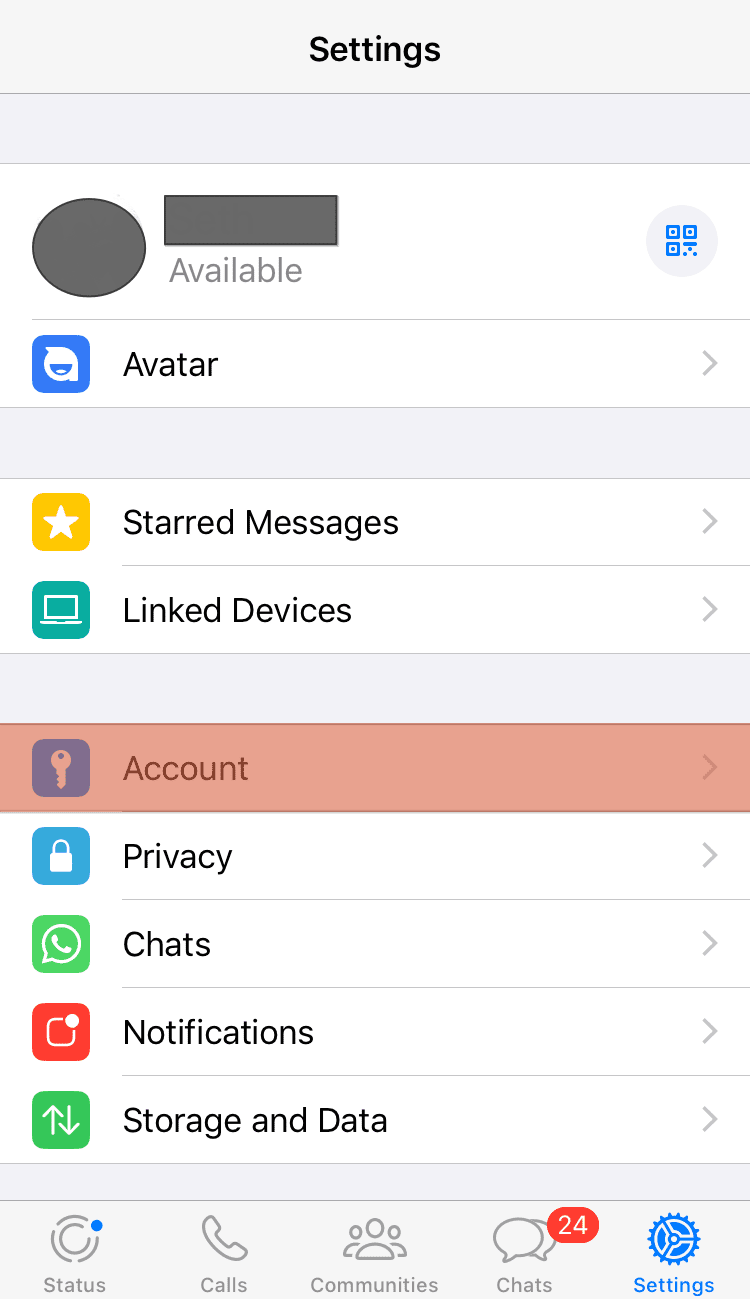
- Tap on “Account.”
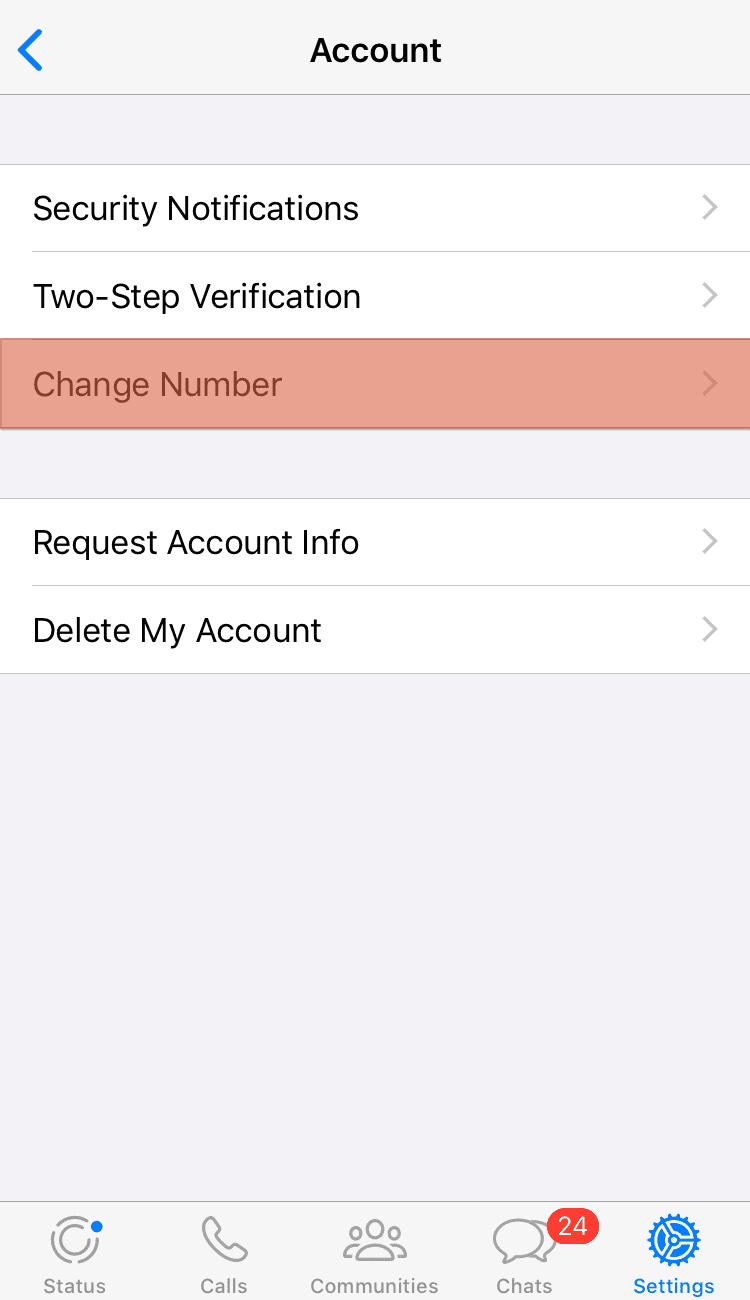
- Select the “Change Number” option.
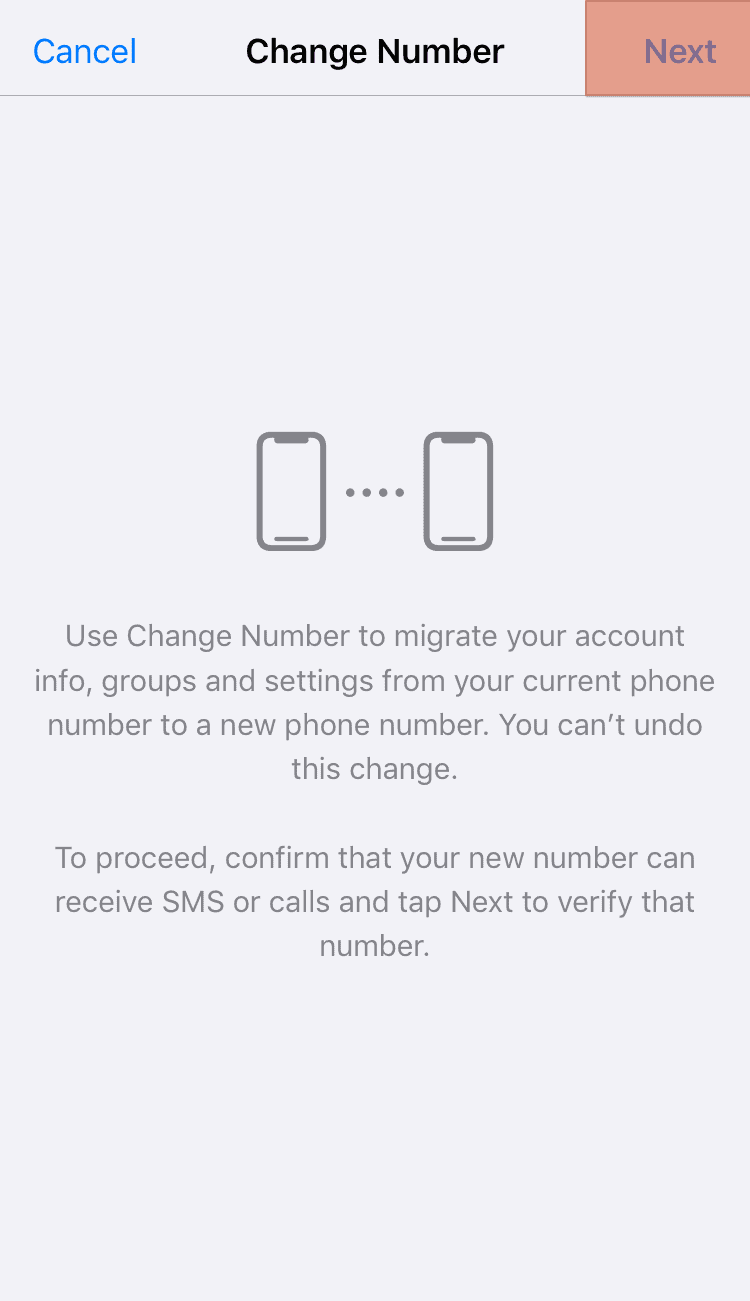
- Tap “Next” in the top right corner.
- Enter your old and new phone numbers.
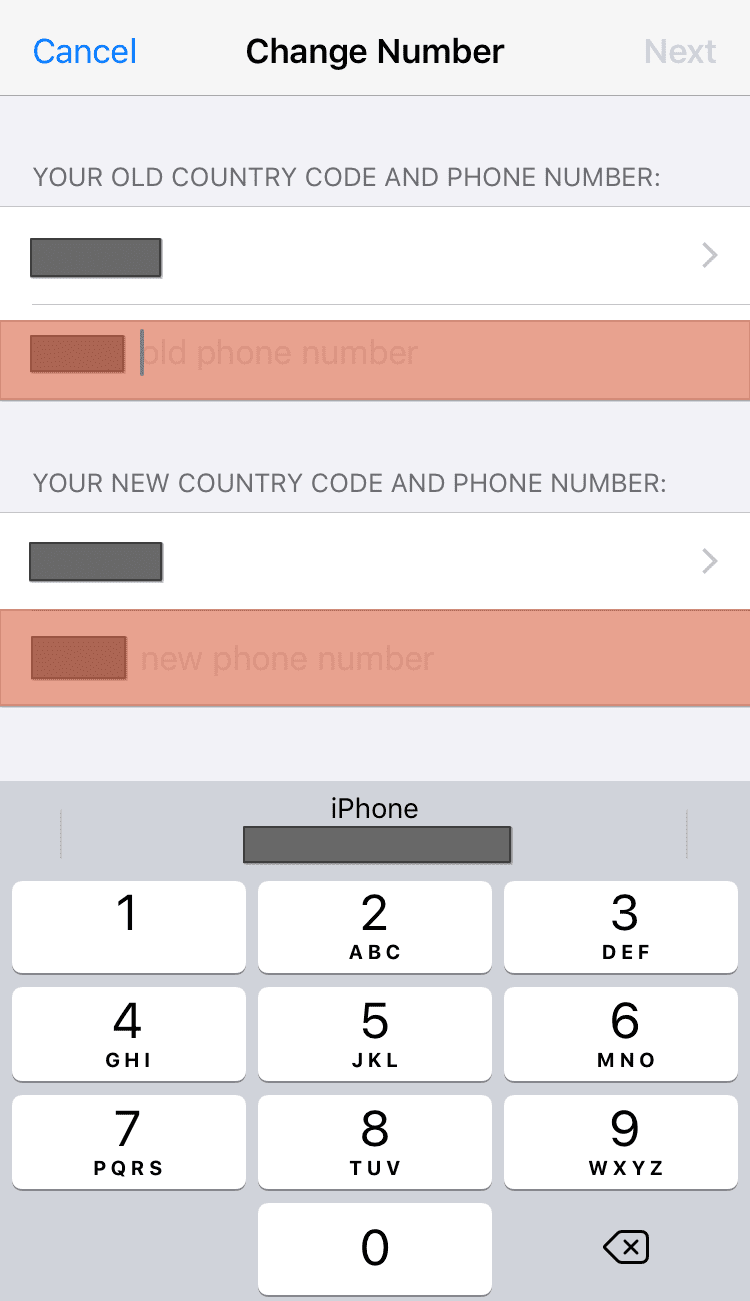
- Tap the “Next” button in the top right corner.
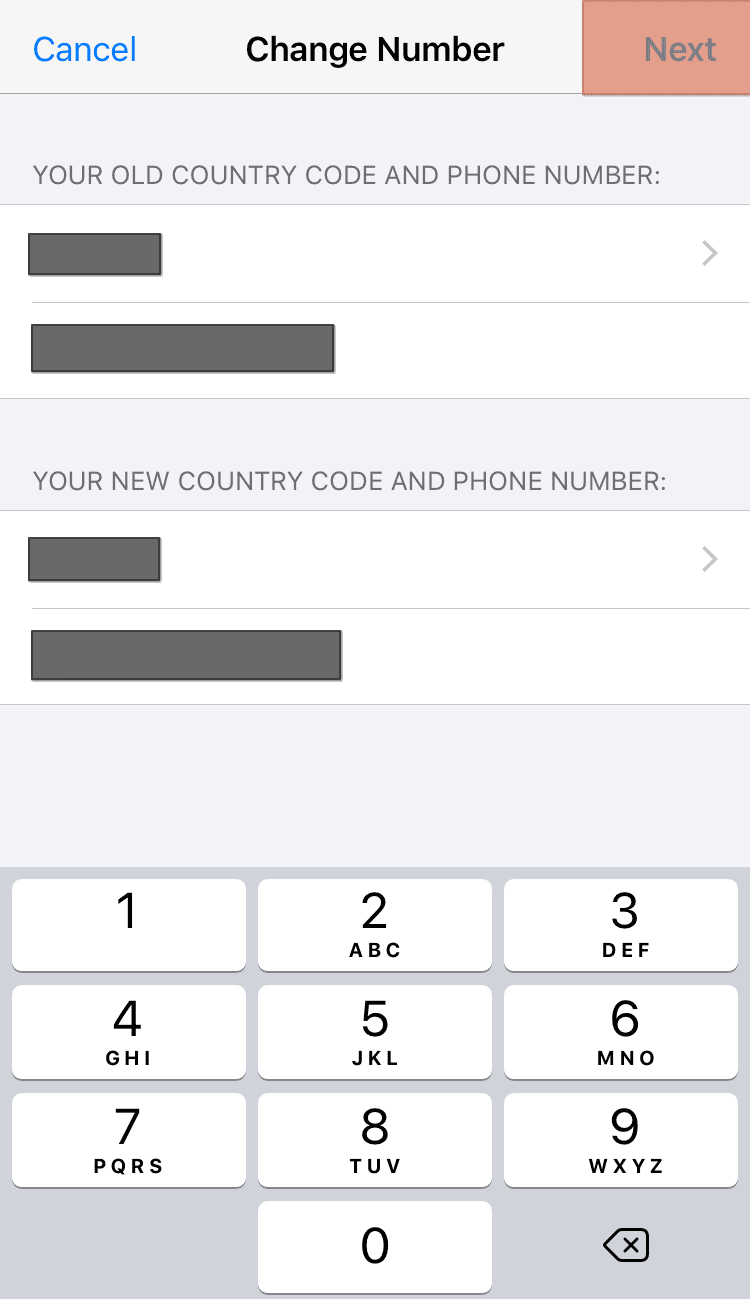
- Turn off the “Notify Contacts” option and proceed with the process.
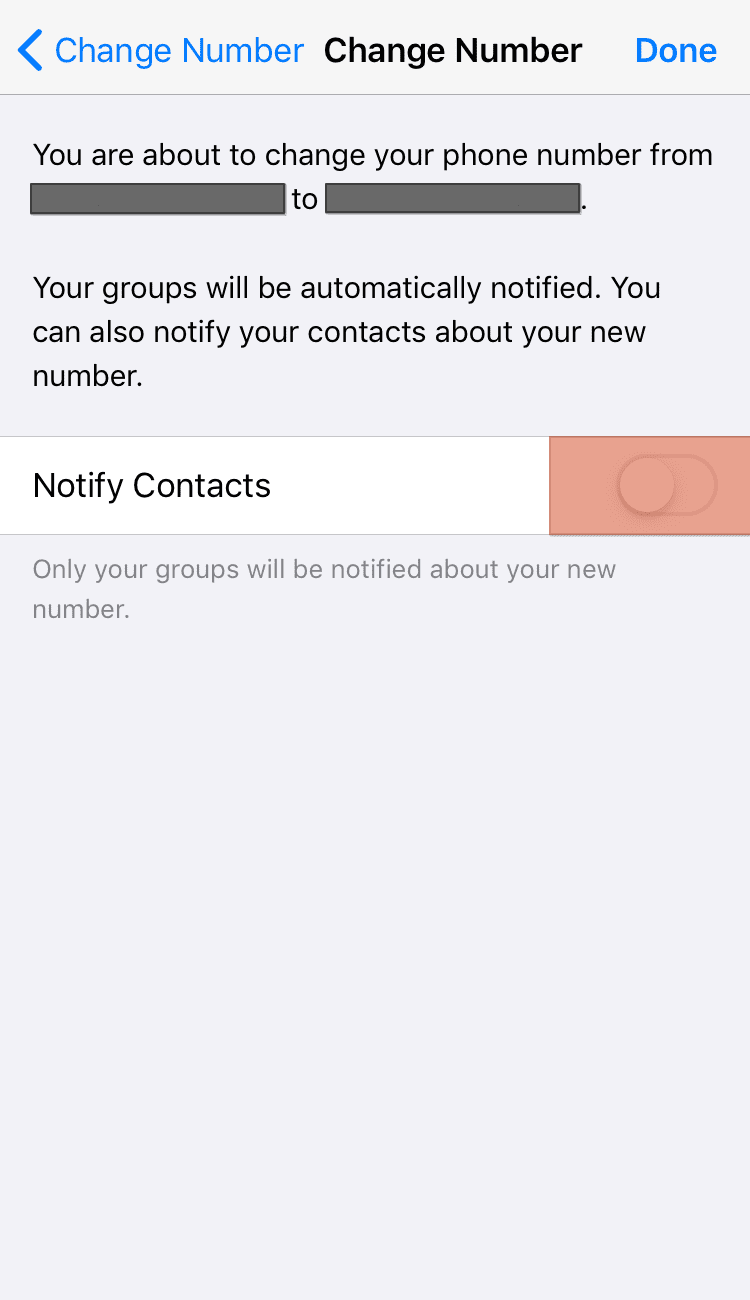
- WhatsApp will send a verification code to the new phone number. Enter it to complete the process.
Although we’ve disabled the option to notify your contacts about the change in your WhatsApp number, there are a few things you should note.
- Your group chats will automatically be notified about the change in WhatsApp number.
- Your account information, such as the chats, group chats, profile pictures, etc., will be transferred to your new phone number.
- Your old phone number will be removed from WhatsApp, and you can use it to register for another WhatsApp account.
- Your WhatsApp settings will remain untouched, such as the status privacy settings.
Conclusion
You can change your WhatsApp number efficiently from your settings page. The new number shouldn’t be associated with WhatsApp for it to be used in your WhatsApp.
To change your WhatsApp number, open WhatsApp and access the settings page. Tap on the “Account” option and select “Change number.” Enter your old and new phone numbers and turn off the “Notify contacts” option. That’s it!


