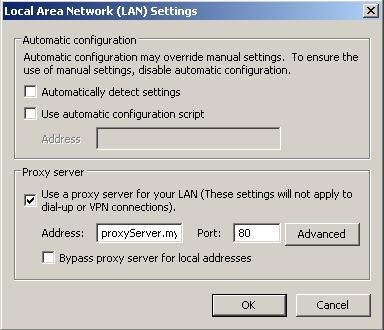
Aside from configuring proxy settings which can be done in a number of ways, there is a common need to allow users, especially those with mobile laptops, to temporarily disable the proxy settings when their devices are not connected to the corporate network, such as in the case of mobile laptops. This is especially important when the user takes their mobile device home, or are connected to a guest network.
The easiest way to address this issue is to place a .REG file on the user’s desktop, start menu, or taskbar. To create a .REG file, start the Notepad application, and just add a few lines of code. Here is an example of what that file may look like.

The value of 00000000 disables this setting while the value of 00000001 enables the setting.
The first line of this file will depend on the operating system your user is using. For RegistryEditorVersion, choose either Windows Registry Editor Version 5.00 for Windows 2000, Windows XP, and Windows Server 2003, and later, or REGEDIT4 for Windows 98 and Windows NT 4.0. The REGEDIT4 header also works on Windows 2000-based, Windows XP-based, and Windows Server 2003-based computers.
You can use the following syntax to update other settings in the registry. Use Notepad or another text editor and save the file as .REG.
Syntax of .Reg Files
RegistryEditorVersion
Blank line
[RegistryPath1]
"DataItemName1"="DataType1:DataValue1"
DataItemName2"="DataType2:DataValue2"
Blank line
[RegistryPath2]
"DataItemName3"="DataType3:DataValue3"
To import this file into the registry (do this at your own risk!), you can do so by double-clicking this REG file, or it can be done via command prompt. Here is an example of how to run this from the command line (For Vista and later, you must run the command prompt as an Administrator, by right clicking and selecting “Run As Administrator”).
regedit /s "path to file"
The /s switch will run the file in “Silent” mode. To verify that the changes have taken effect, open the Registry editor, or close and re-open Internet Explorer. Access the IE options, navigate to the Connections tab, LAN settings. The checkbox for Use a proxy server for your LAN should now be unchecked.


